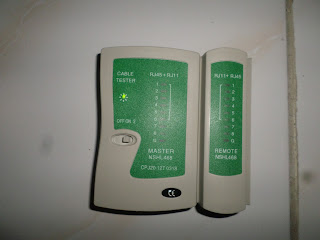
Tools and materials
1. Crimping Pliers
2.
Cable Tester
3.
RJ 45
4.
Utp Cable
To configure a UTP cable there
are 2 kinds of ways
1. Configuration utp straight cables
2. Configuration utp cross cable
The difference in the wiring configuration for
the Straight is to connect different tools
such as:
1. the hub to pc
2. the router to hub
3. the access
point to the router
While the configuration
of the cable Cross is to
connect the same tools such as:
1. the hub to hub
2. the router to
router
3. switch to the
switch
This is RJ45 Pin so
that friends do not wrong in plugging the cable utp should
be from the end where
How to configure wired Straight
1. The order of the colors
for wiring straight is: orange white, orange, green,
white, blue, blue, white, green, Brown, white, Brown. The order applies
to pin 1 and pin 2 RJ45
2. After sorting position cable like the image above now lives with RJ45 utp cable pair you guys have.
3. after the clamp is attached with the crimping pliers you
guys have
4. Once installed do the
above step on the other end of the cable utp cable with
order as in the first step, once that is done then the end result will be as below.
!!! remember the end
of the cable utp must be opposite like the above
picture white orange color on the left and the right of the orange white, this
is the part that should be kept in mind because if you
later go wrong then the wires will not be used and
should cut the cables to reconfigure because it is already locked
by crimping pliers!!!
5. once all done live check
with Cabel tester whether the configuration that we
have to do is correct the error is still there, or if
there are lights in the pin/cable tester which is not lit although
one you must make configuration/setting reset your cable in
order to function properly.
2. How to
configure Cable Cross
1. to Cross wired Pin
1 order is: orange white, orange, green, white, blue, blue,
white, green, Brown, white, Brown
To order is: pin
2 green white, green, orange, white, blue, blue, white, orange,
Brown, white, Brown
3. after the clamp is attached with the crimping pliers you
guys have
4. Once installed do the
above step on the other end of the cable utp cable with
order as in the first step, once that is done then the end result will be as below.
!!! remember the end
of the cable utp must be opposite like the above
picture white orange color on the left and the right of the Green and
white, this is the part that should be kept in mind because
if you later go wrong then the wires will not be
used and should cut the cables to reconfigure because it is
already locked by crimping pliers!!!
!!! Note!!!
utp cable for cable Straight now more
widely used for network configuration of the computer even
though the straight cable just to connect different tools but now the
straight cable can also connect the same tools such
as:
1. switch to the
switch
2. the hub to hub
3. pc to pc and
others
Editor : Arga Yudha Adhiprama


0 Response to "How to setting / configuration utp cable category 5e"
Post a Comment